Organization Intervention
The DRC.O system has recently been upgraded to include organization interventions. An organization intervention helps students build competencies in organizing their materials and belongs (e.g., desks, bookbags, cubbies) and helps them become more independent with these skills over time. In this chapter, you will learn about the steps for creating an organization intervention that is individualized to your students.
Creating an Organization Intervention
You can create an Organization Intervention either after completing the Screening Survey by clicking on “Start” by an” Org Intervention,” or by going to the student’s profile and clicking on the “Org Intervention” tab.
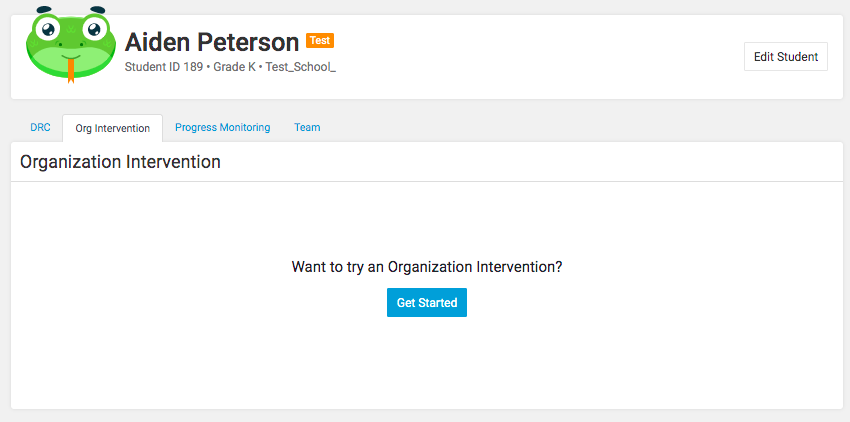
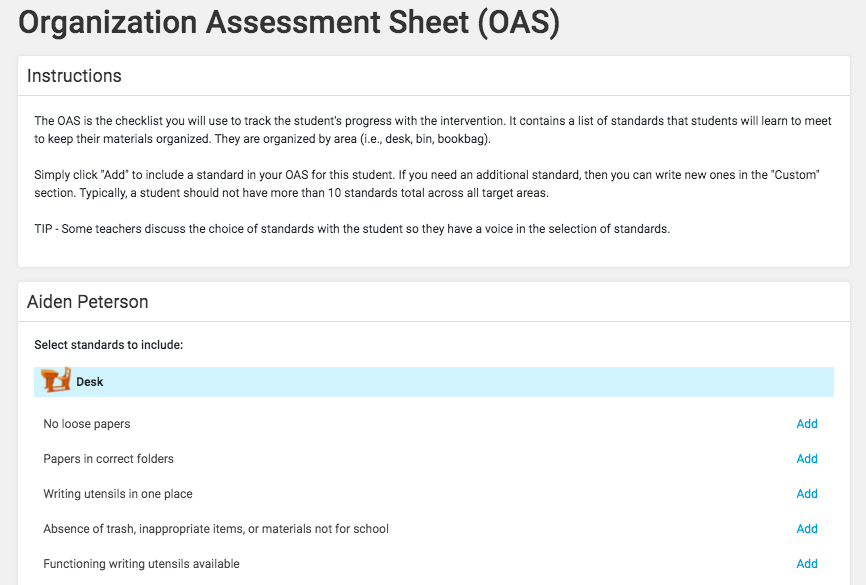
After clicking on “Get Started”, you will be brought to the Organization Assessment Sheet (OAS for short). The OAS is a checklist you will use to track the student’s progress with the intervention. It contains a list of standards that students will learn to meet to keep their materials organized. The standards are organized by area (i.e., desk, bin, bookbag). Click “Add” to include a standard in the student’s OAS.
TIP – Some teachers discuss the choice of standards with the student before selecting the standard, so the student can have a voice in the process.
Creating Custom Standards
If you need an additional standard(s) not listed, then you can create one in the “Custom” section.
To add a custom standard, type the new standard in the custom field and click the “Add” button. This custom standard will be added to the list. Click Add to add to your student’s OAS sheet.

Once each standard has been added, click on “Create OAS”.
Each time you go to your Dashboard, you will see your student and a link to open your student’s OAS to start tracking data.
Tracking OAS Data
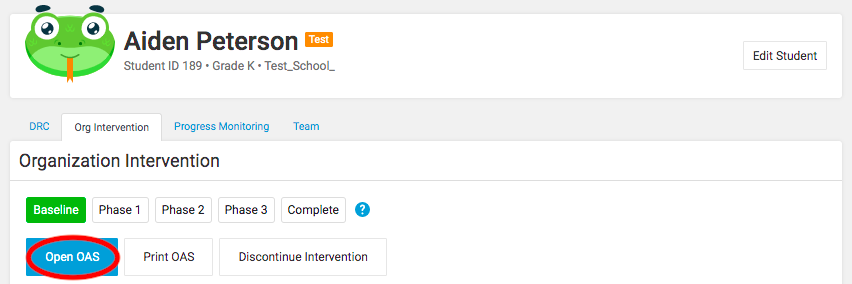
You can track your student’s Organization Standards is to go to the student’s profile and click the “Org Intervention” tab. From here, you can open the OAS and start tracking your student’s data.
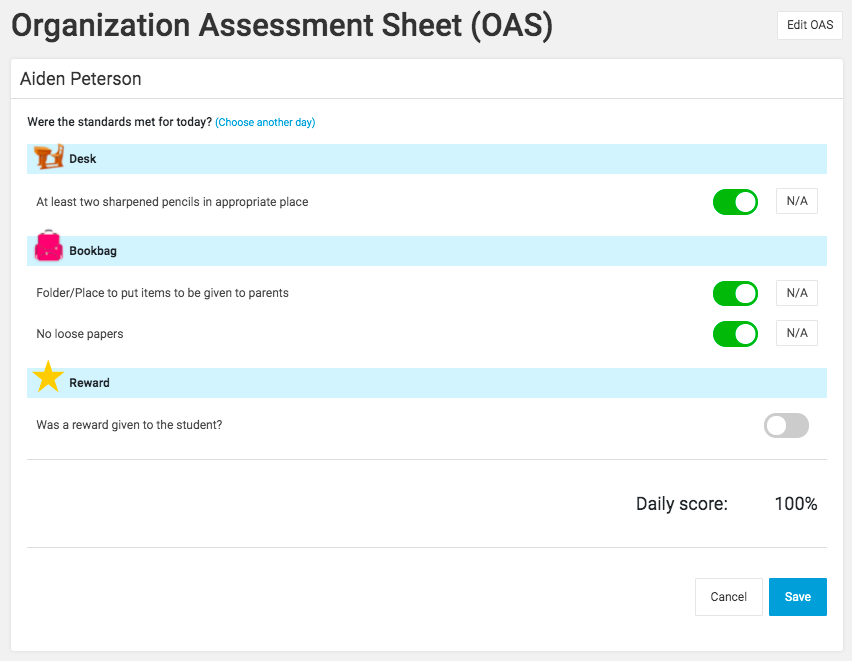
If the student met an organization standard for the day, click on the button next to the standard. Green indicates that the standard was met. If the student did not meet the standard, do not click the button (leave it grey). If the student received a reward for the day, you will also be able to track that here. Once the standards are checked, click “Save.”
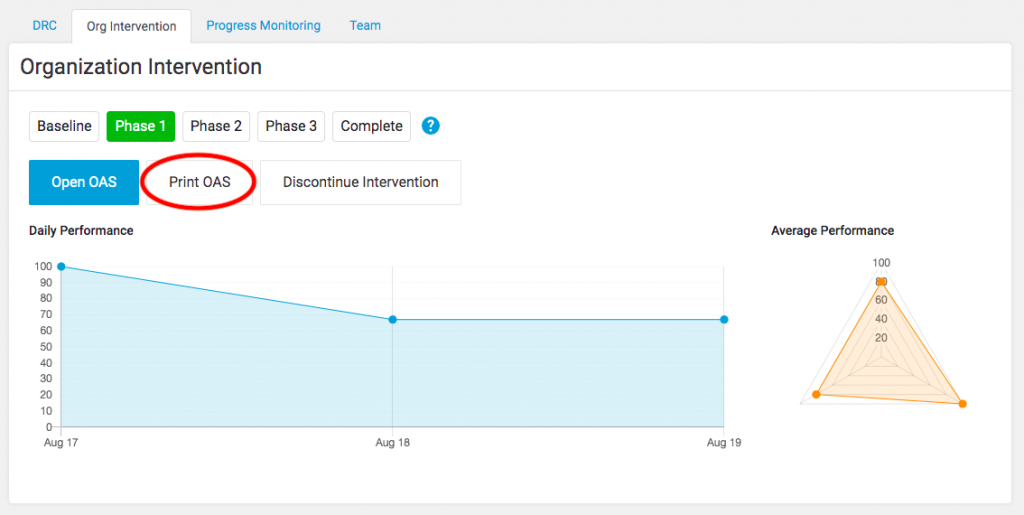
Printing OAS Tracking Sheet
You have the option to print the student’s OAS tracking sheet. It may be helpful to place this printed OAS tracking sheet on your student’s desk as a reminder of the standards they are working towards. You may also review the student’s OAS with the student at the end of the day or week discussing if each standard has been met.
Baseline OAS Data
To increase the success of an organization intervention, you will first track the student’s baseline data. Track baseline data for 3 days. Use the OAS to check the student’s organization a few times while the student is out of the room without leaving any feedback. This information provides a baseline to later determine if the intervention is working. In addition, this serves as a pilot test to determine if all the standards that are needed are on the OAS.
Once you collect the student’s baseline data, it is now time to start the organization intervention with the student.
Implementing an Organization Intervention with a Student
After collecting OAS baseline data for 3 days, you should review your student’s OAS and make any appropriate changes based upon the baseline data that you have collected.
Phase 1. At the start of phase 1 of the intervention. You should meet with your student to reorganize his/her materials so that they are consistent with all the standards. The first meeting can take 10 to 15 minutes depending on the level of disorganization. Sometimes it is easiest to have the student empty everything out of the space, get rid of items that do not belong and put materials back in the space in a manner consistent with the standards on the OAS. This should be done collaboratively with the student.
After the initial meeting, the teacher should meet with the student three times per week. At each meeting, you should review each standard, one at a time, to see if the student met the standard. If the standard is met, praise the student. If the standard is not met, tell the student to fix the problem (e.g., put loose papers into a folder). It is critical that the student, not the teacher, fix this error, as this helps the student build the organization skill. Although the first few meetings may take up to 10 minutes, overtime meetings will only be about two to three minutes long.
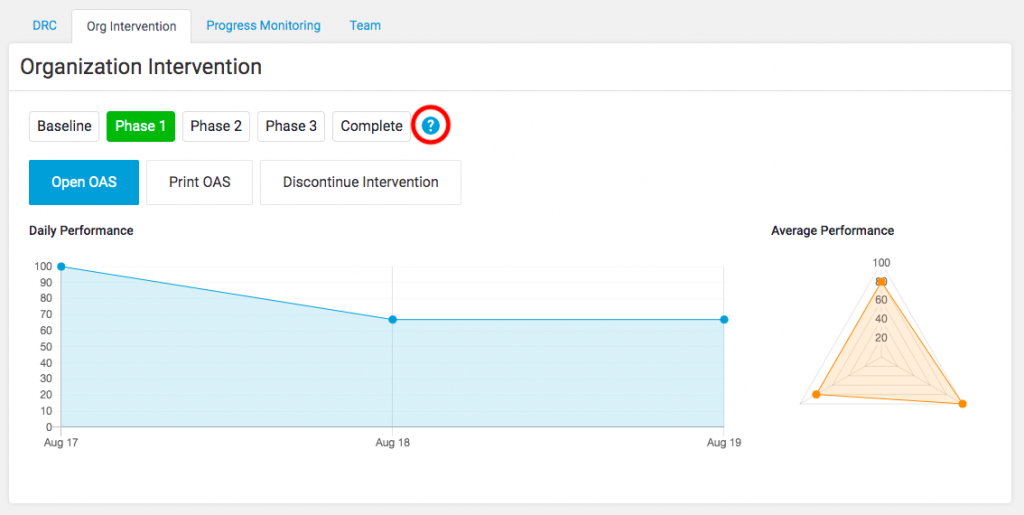
Click on the question mark to learn more about each phase.
Editing and Updating the OAS
If you need to remove and/or add a standard to a student’s OAS, simply click on “Open OAS” for the student. This can be accessed via the Dashboard or by going to the student’s profile and clicking on the “Org Intervention” tab. Click the “Open OAS.”
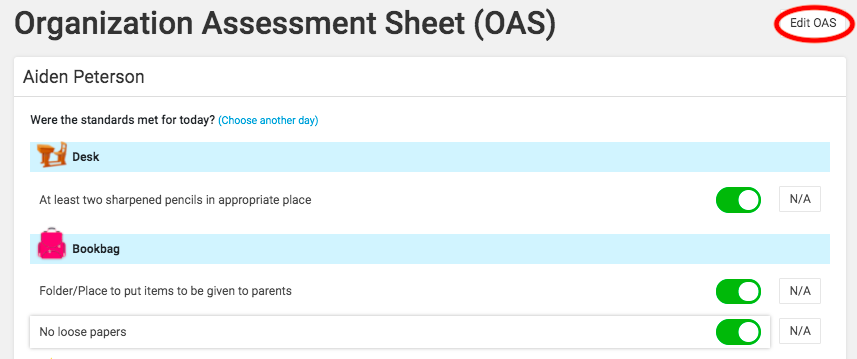
Once you open the OAS, click the “Edit OAS” button in the top right.
From here, click the “Add” button by each standard to include or remove a standard.
Entering Missed Data on the OAS
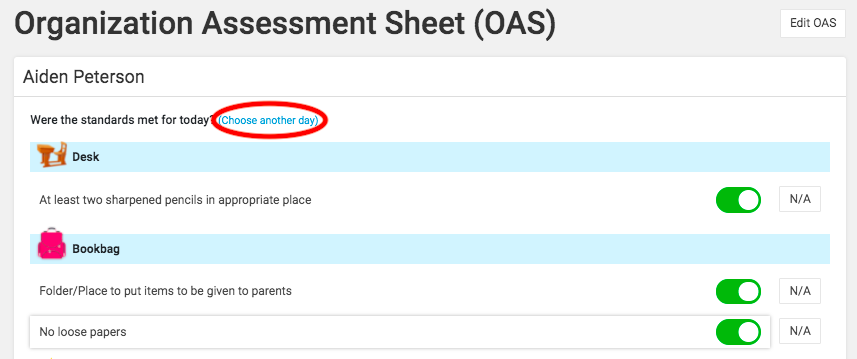
It is understandable if you miss entering OAS data for a day and/or you prefer to enter daily data for the week at the end of the week. To enter OAS data for a previous day, open the OAS and click the “Choose another day” option. Clicking on this link will allow you to choose the desired data from the calendar and enter the data.
Understanding the OAS graphs
The graphs on the OAS tab show the student’s progress each day. Specifically, the graph on the left shows the percent of all standards on the OAS that were met on a given day. The graph on the right is called a “spider” graph. It reveals the percent of days in which each individual standard has been met over time. If you hover over a data point, you can see which standard is represented. For example, in the graph below, the standard of “X” has been met on 20% of school days.