Implementing a DRC Across Multiple Periods
- Multiple teachers targeting the same target behavior (appropriate use of materials) across separate classrooms
Example: Charlie Agulara is a student who struggles with using their materials appropriately in class. Ms. Owens wants to target appropriate use of materials in science, and Mr. Bianowicz wants to target this same target behavior in reading and math.

If you would like to implement a student’s DRC intervention across multiple periods throughout the day, follow the instructions below.
Important Note:
If a DRC has already been created for this student that you would like to add on to, then skip to STEP 7. Otherwise, if this student needs to have a DRC created for them, continue on to STEP 1.
Step 1: Sign in
(1) Sign into DRC.O as a School Admin user.
NOTE: This first step is important; only School Admin users can add a user other than themselves to a student’s intervention team.
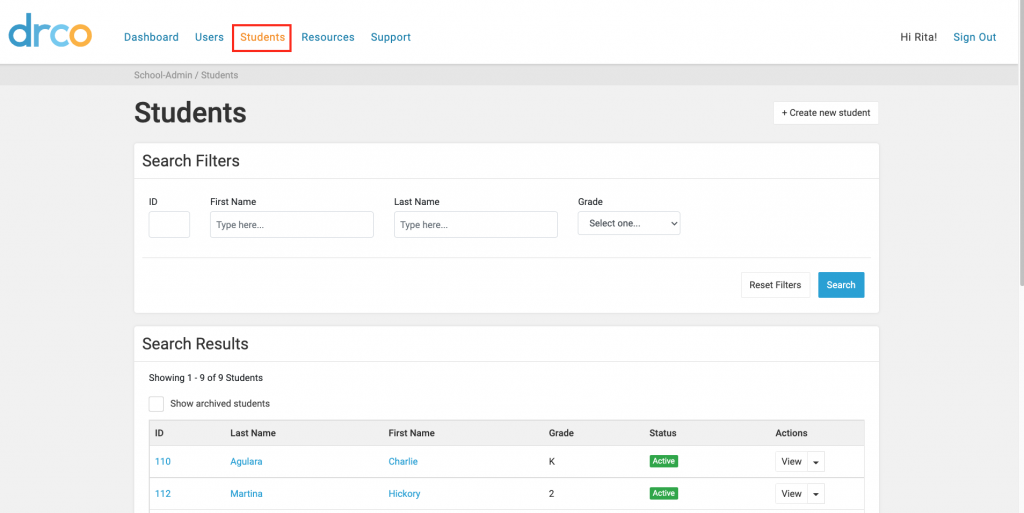
Step 2: View the student’s profile
(2) Click “Students” in the main navigation menu (see red box below), find the student whose intervention you would like to implement across multiple periods, and click on their name to view their student profile.
NOTE: If a profile has not been created for this student, then create one by clicking the “Create new student” button and following instructions for “Adding a New Student” found on this page HERE.
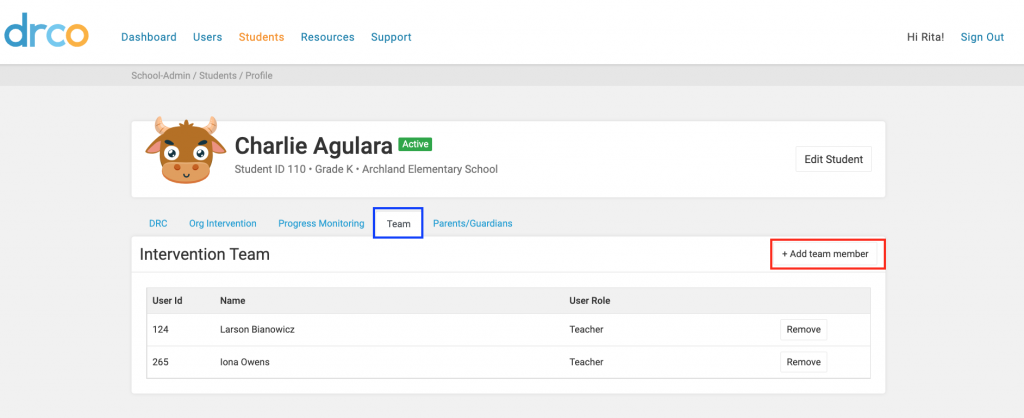
Step 3: Add team members for the intervention
(3) Click on the “Team” tab of the student’s profile (see blue box below) and click “Add team member” (see red box below) to add users to the student’s intervention team. Any user on the student’s intervention team can create a DRC as well as track target behaviors.
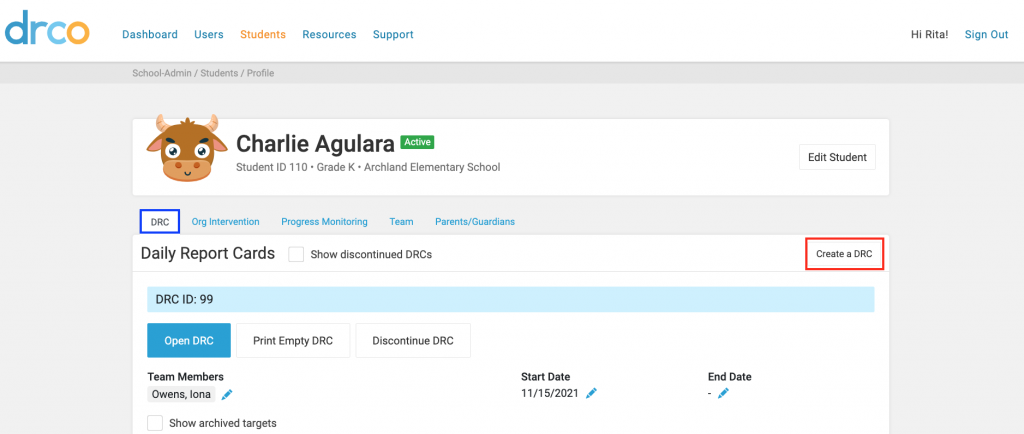
Step 4: Create the DRC
(4) Click the “DRC” tab of the student’s profile (blue box below) and start the DRC creation wizard by clicking “Create a DRC” (red box below).
Step 5: Assign team members to the DRC
(5) Select multiple intervention team members that you would like to have access to this student’s DRC intervention. These team members should be primary instructors that will be tracking the behaviors for each period.
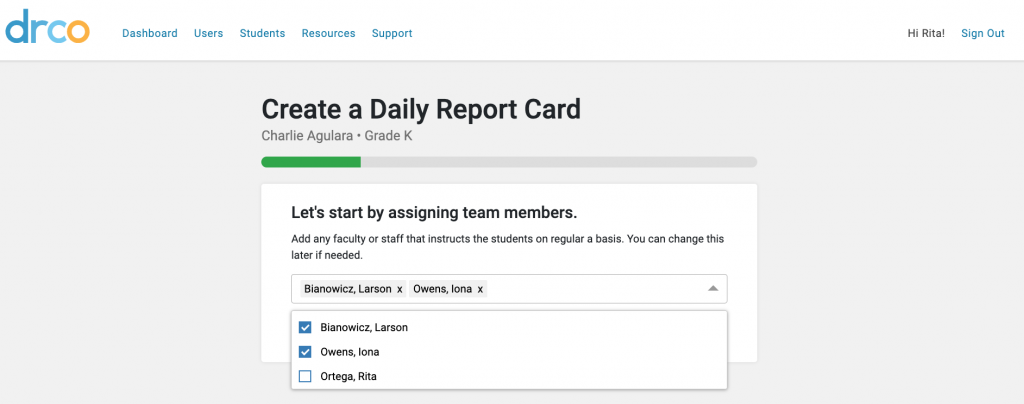
In this case, Larson Biancowicz and Iona Owens are the student’s primary teachers. Rita Ortega is the school administrator and will not be tracking DRC behaviors, so this person will not be assigned to the DRC team. However, if Rita Ortega would like to be able to view this student’s DRC and review this student’s progress, they can be assigned to the DRC team.
Step 6: Complete the DRC wizard for the first period
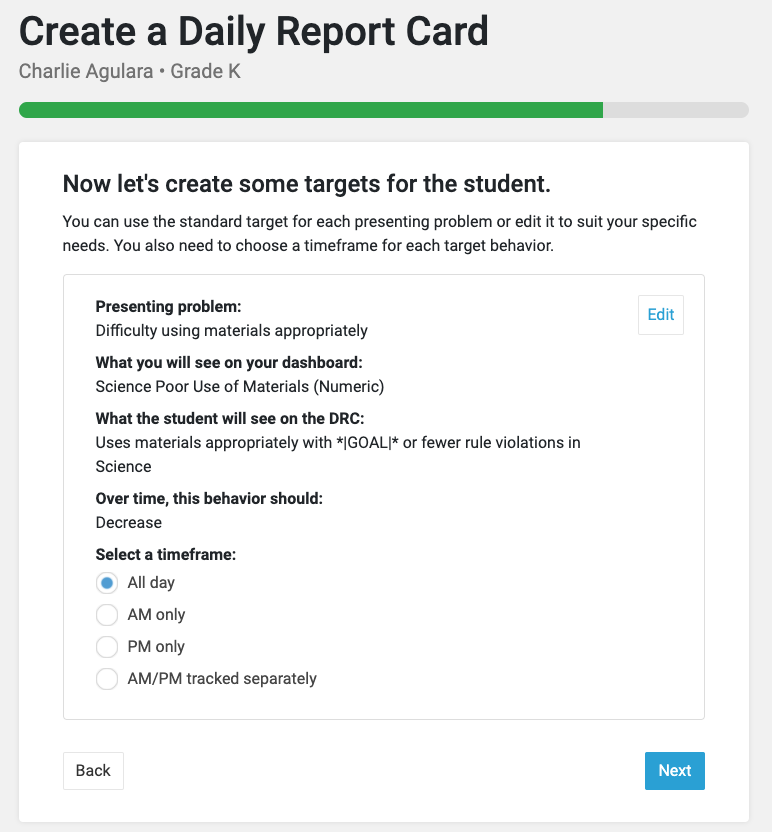
(6) Complete the DRC wizard for one of the periods in which the intervention will be implemented (e.g. Science).
NOTE: Comprehensive instructions for completing the DRC wizard can be found in the “Start the DRC Wizard” section of this page HERE. The following instructions will include how to complete the DRC Wizard for a target that will be tracked across multiple periods.
First, select the behavior that you would like to target across multiple periods.
In this example, the student’s appropriate use of materials is the behavior that we are trying to track across multiple periods. Therefore, this is the behavior that will be selected in the DRC wizard.
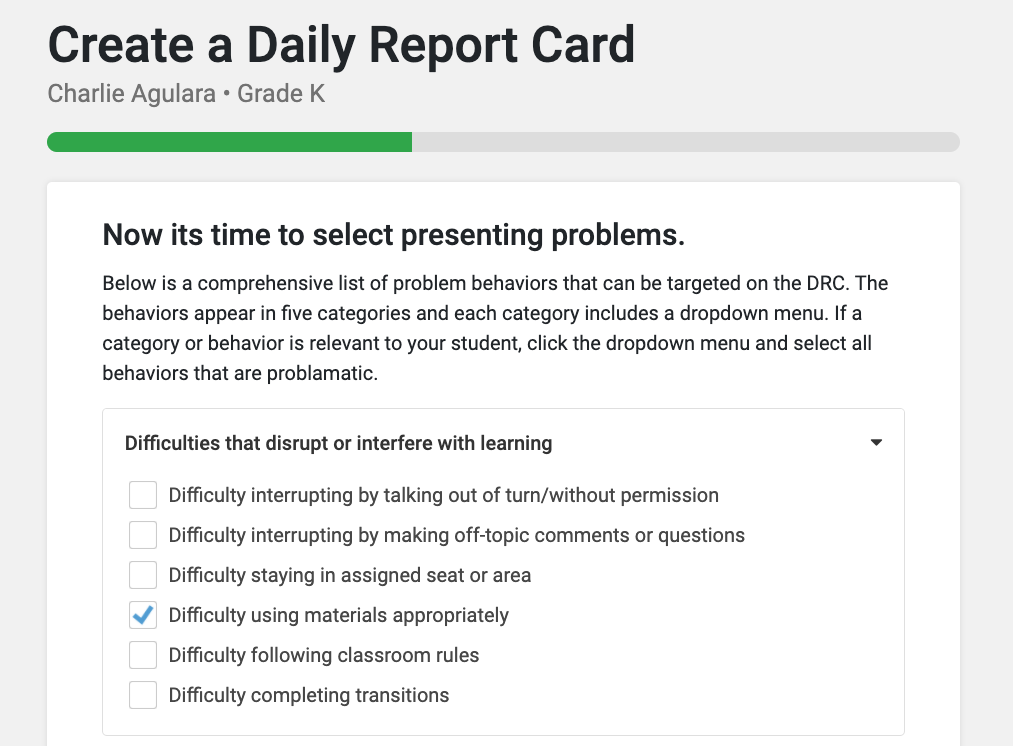
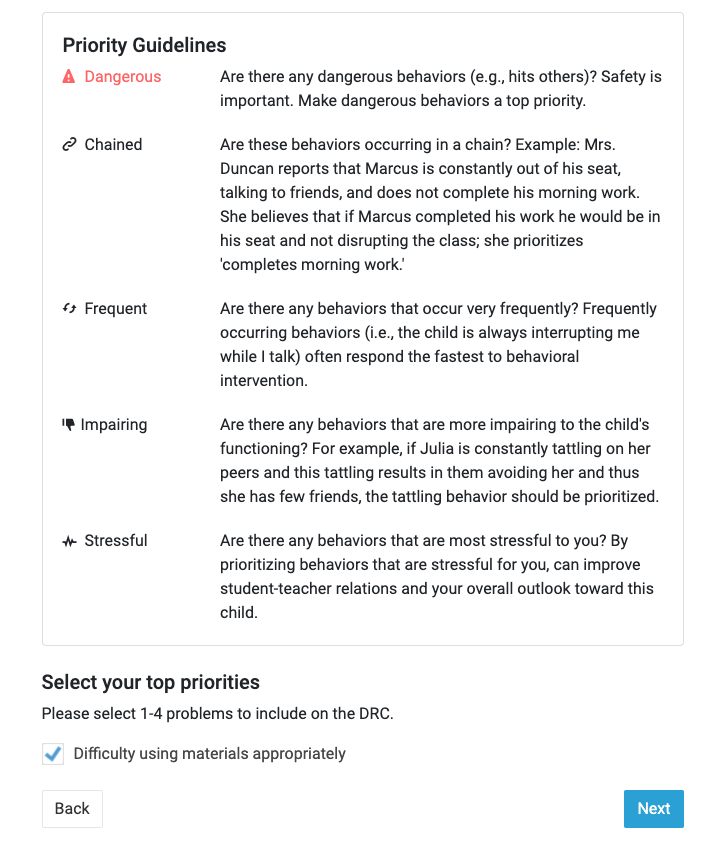
The DRC wizard will also ask you to select your top priorities. Select the behavior that you chose to track across multiple periods and click “Next”.
Second, edit the target to specify which period this target will reflect.
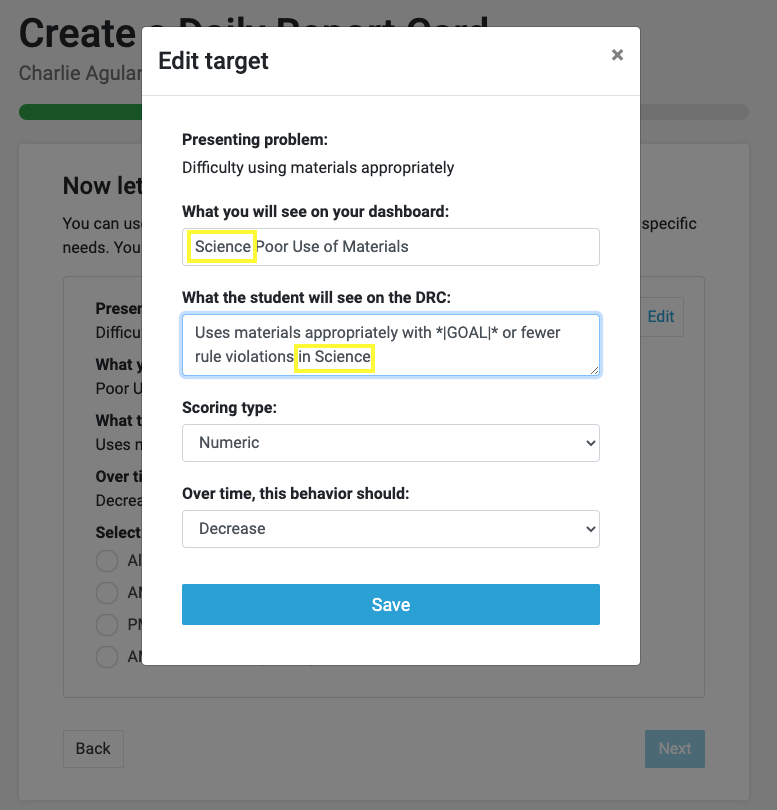
In order to specify on the DRC that this behavior will be tracked for multiple periods, this target needs to be edited. Click the “Edit” button in the top right corner (see red box below).
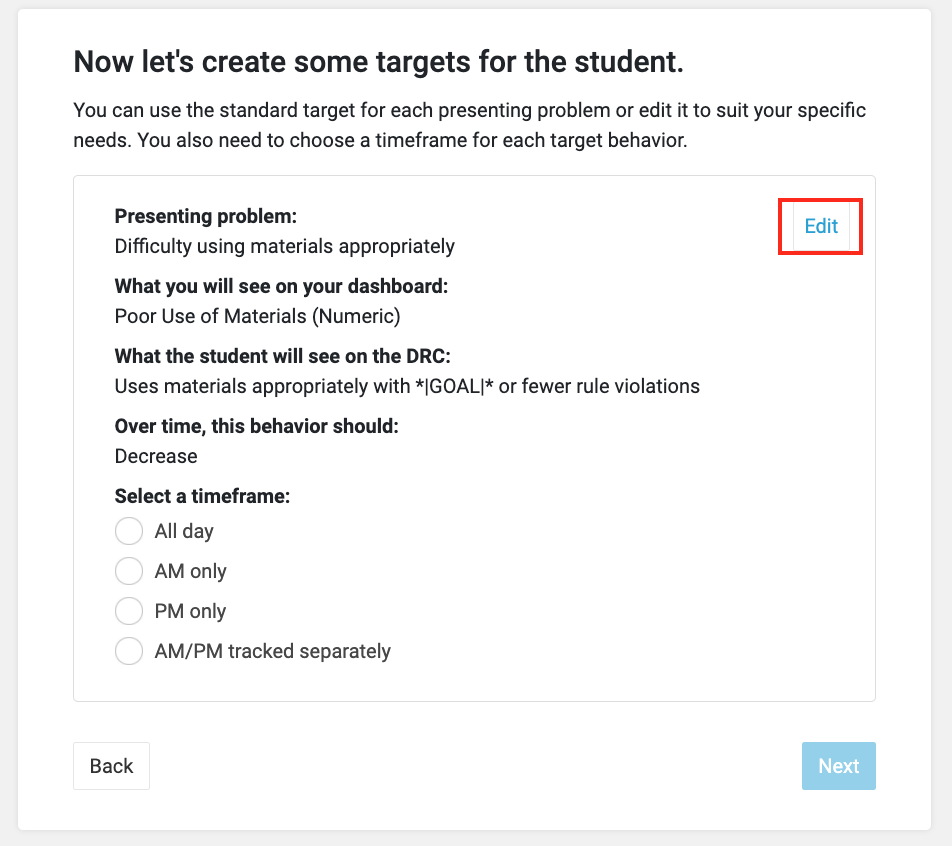
In this “Edit” window, you will need to specify which period this target will be tracked in both the “What you will see on your dashboard” and the “What the student will see on the DRC” sections (see yellow boxes below). For this example, this behavior will be tracked in science, so the text was added to reflect this subject (see yellow boxes below). Click the blue “Save” button when completed.
Third, select “All day” for the time that this target will be tracked. Click the blue “Next” button to proceed and click the “Finish the DRC Wizard” on the next page.
NOTE: If there are multiple behaviors that you would like to track in multiple periods, that can be done. Make sure that you edit all of the selected behaviors for the same period (see yellow underlining below for an example).

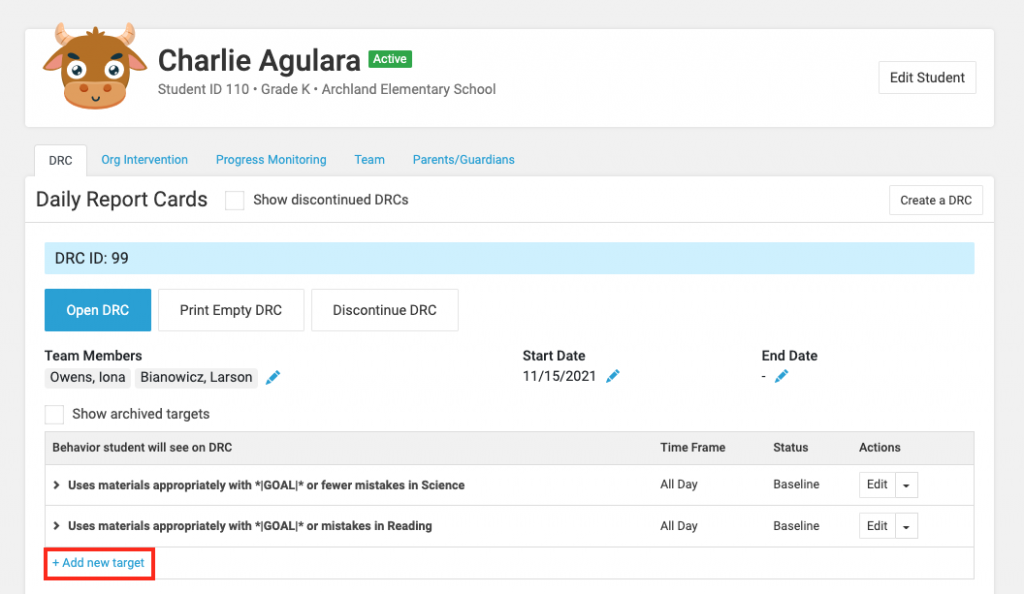
Step 7: Repeat Step 6 for each of the periods
(7) To add a period to the DRC in which the intervention will be implemented, click “+Add new target” on the student’s DRC tab in their student profile (red box below) and repeat step number 6 (e.g. Math).
NOTE: Step 6 needs to be completed for each period in which the intervention will be implemented. For example, if the intervention will be implemented across 8 different periods, then this step will need to be repeated 8 different times (for each period).
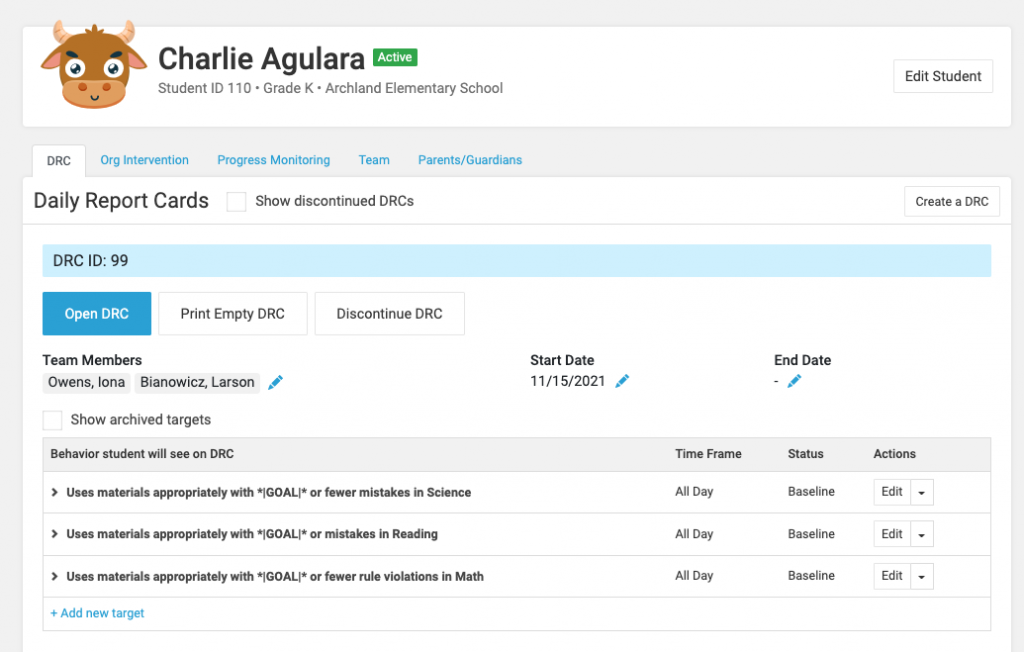
In this continued example, the student’s target behavior will be tracked during Science, Reading, and Math. Targets for the Science and Reading period have already been added, but you can follow these instructions to track this behavior during the Math period, as well.
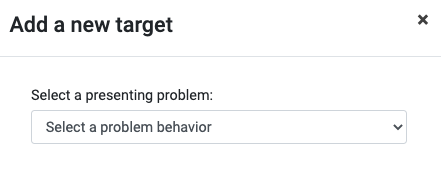
First, click on the “+ Add new target” button on the student’s DRC tab in their Student Profile (see red box below).
You will then be prompted to select the problem behavior that you would like to add to the intervention.
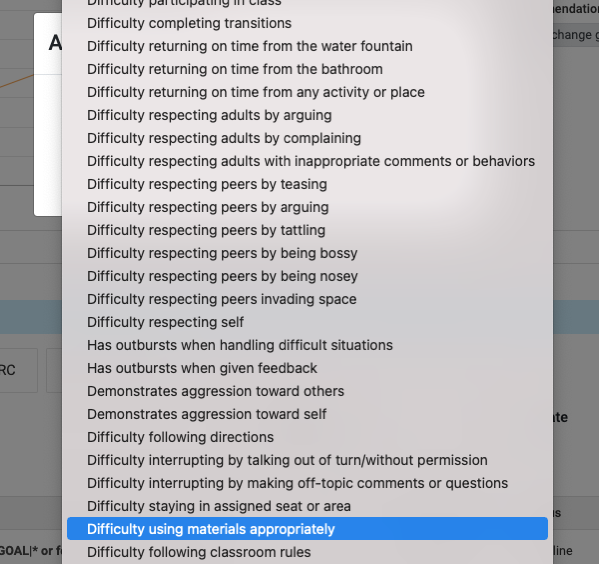
Since, in this example, you want to add a target for the “uses materials appropriately” goal in the Math period, you will scroll down to the “difficulty using materials appropriately” behavior, highlighted below in blue.
Next, as you did before, edit the target so that the “What you will see on your dashboard” and “What the student will see on the DRC” sections specify which period this target will be tracked. In this case, you will add the text about Math (see yellow underlining below).

Make sure that the timeframe you select for tracking is still “All Day”. Then click the “Add target to DRC” button.
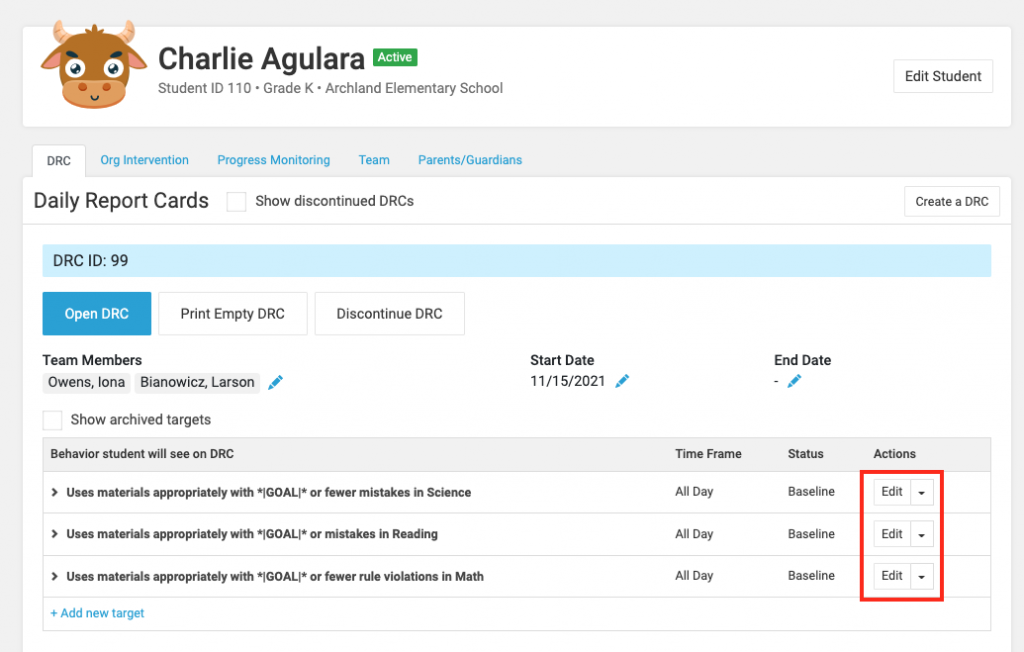
Now you are able to see this goal (using materials appropriately) across multiple periods. Note that if you would like to edit the goals so that the student sees the same language for all periods, you can click “Edit” in the Actions column on the right (see red box below).
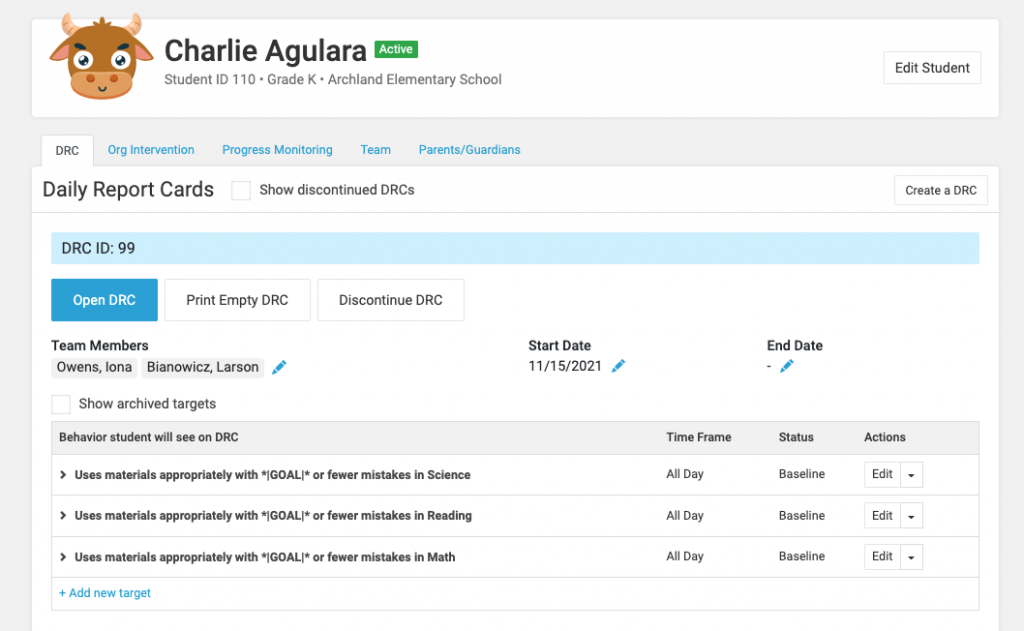
For this example, the language chosen was “mistakes” rather than “rule violations”, so those edits were made to each period’s target.
This step can be repeated for however many periods the intervention will be implemented.
Now each user assigned to this student’s DRC will be able to see and edit their goals.
Troubleshooting:
What if I do not want all users to be able to see and/or edit the student’s goals for every period on their dashboard? What if I just want teachers to see goals that are relevant to their class period when they are on their dashboard?
If you would like teachers to only be able to see their own period’s targets on their dashboard, then you will have to create separate DRCs for each period. For instructions on how to create separate DRCs for separate settings, click HERE.